반응형
What’s new in UIKit
- Productivity Improvements → desktop class IPad 앱을 위한 업데이트
- Improved navigation bars
- Document-based 앱을 위한 두가지 네비게이션 스타일 추가
- Browser
- Editor
- 툴바 커스텀이 가능하고, 이는 앱을 다시 켜도 유지된다.
- Mac Catalyst에도 자동으로 지원된다.
- Document-based 앱을 위한 두가지 네비게이션 스타일 추가
- Title Menu
- 타이틀을 눌렀을 때 이동, 복제, 이름 변경, 출력 등의 표준 기능들을 delegate 메소드 구현 여부에 따라 띄워줌
- 커스텀 메뉴를 제공하는 것도 가능
- Find and replace
- 기존 in-app 검색과는 다르다. 이는 텍스트 기반으로 동작하는 것
- UITextView나 WKWebView, PDFView 등에서 플래그를 활성화 함으로써 지원한다.
- 뷰 하나에만 적용되지 않고 여러 뷰와 문서에 걸쳐서 적용된다.
- Editing interactions
- UIMenuController가 deprecate되고 UIEditMenuInteraction이 추가.
- 터치로 했을 때와 포인터로 했을 때의 동작이 다르다. 포인 터로 했을 때 더 많은 메뉴가 드러난다.
- UI update
- slide over모드인 sidebar의 디자인 변경(more vibrant) → 추가 코드 없음
- Improved navigation bars
- Control enhancements
- UICalendarView: UIDatePicker에서 쓰던 뷰를 완전히 독립적으로 쓸 수 있게 됨.
- 단일 날짜, 다중 날짜 지정 등의 선택 모드 제공
- 특정 날짜를 선택에서 제외하는 것도 가능
- 개별 날짜에 데코레이터 뷰를 제공하는것도 가능
- UIDatePicker와는 다르게, 데이터 모델로 NSDate가 아닌 NSDateComponents를 사용함 → 더 세밀하게 지정하기 위해서
- current Calendar에 대해서 명시적으로 지정해서 쓸 것.
let calendarView = UICalendarView() calendarView.delegate = self calendarView.calendar = Calendar(identifier: .gregorian) view.addSubView(calendarView) let multiDateSelection = UICalendarSelectionMultiDate(delegate: self) multiDateSelection.selectedDates = myDatabase.selectedDates() calendarView.selectionBehavior = multiDateSelection func multiDateSelection( _ selection: UICalendarSelectionMultiDate, canSelectDate dateComponents: DateComponents ) -> Bool { return myDatabase.hasAvailabilities(for: dateComponents) } // Configuring Decorations func calendarView( _ calendarView: UICalendarView, decorationFor dateComponents: DateComponents ) -> UICalendarView.Decoration? { switch myDatabase.eventType(on: dateComponents) { case .none: return nil case .busy: return .default() case .travel: return .image(airplaneImage, color: .systemOrange) case .party: // 인터렉션 불가 // 가용 크기를 넘어가면 짤림 return .customView { MyPartyEmojiLabel() } } } - UIPageControl
- 커스텀 인디케이터 적용 가능(선택 여부에 따라 다른 이미지 적용)
- Orientation과 Direction도 커스텀 가능
- // Vertical page control with custom indicators pageControl.direction = .topToBottom pageControl.preferredIndicatorImage = UIImage(systemNamed: "square") pageControl.preferredCurrentIndicatorImage = UIImage(systemNamed: "square.fill")
- UIPasteBoard
- 기존에 Pasteboard에 접근하면 배너가 뜨던 것이 alert으로 변경되었다.
- 시스템이 제공하는 인터페이스는 이 얼럿을 띄우지 않을 수 있다.
- 복사를 하기 위한 컨트롤을 쓰던 경우, UIPasteControl을 쓰면 얼럿이 뜨지 않는다.
- filled 스타일의 UIButton과 유사
- 복사하려는 컨텐츠가, 지정된 타겟과 호환될 때에만 활성화된다.
- UICalendarView: UIDatePicker에서 쓰던 뷰를 완전히 독립적으로 쓸 수 있게 됨.
- API refinements
- UISheetPresentationController의 detent에 커스텀 기능 제공
- 하단 safe Area는 고려하지 않은 값을 내보내야 한다.
- // 상수 sheet.detents = [ .large(), .custom { _ in 200.0 } ] // 비율 sheet.detents = [ .large(), .custom { context in 0.3 * context.maximumDetentValue } ]
- identifier를 제공해서, 다른 API에서 써먹을 수도 있다.
- // Define a custom identifier extension UISheetPresentationController.Detent.Identifier { static let small = UISheetPresentationController.Detent.Identifier("small") } // Assign identifier to custom detent sheet.detents = [ .large(), .custom (identifier: .small) { context in 0.3 * context.maximumDetentValue } ] // Disable dimming above the custom detent sheet.largestUndimmedDetentIdentifier = .small
- System Symbol이 렌더링 모드 지정이 안된경우, 원래는 무조건 monochrome이였는데, 이제는 자체적으로 가지고 있는 기본값으로 렌더링 된다.
- monochrome을 명시적으로 지정하려면 다음 API를 사용.
- UIImage.SymbolConfiguration.preferringMonochrome()
-
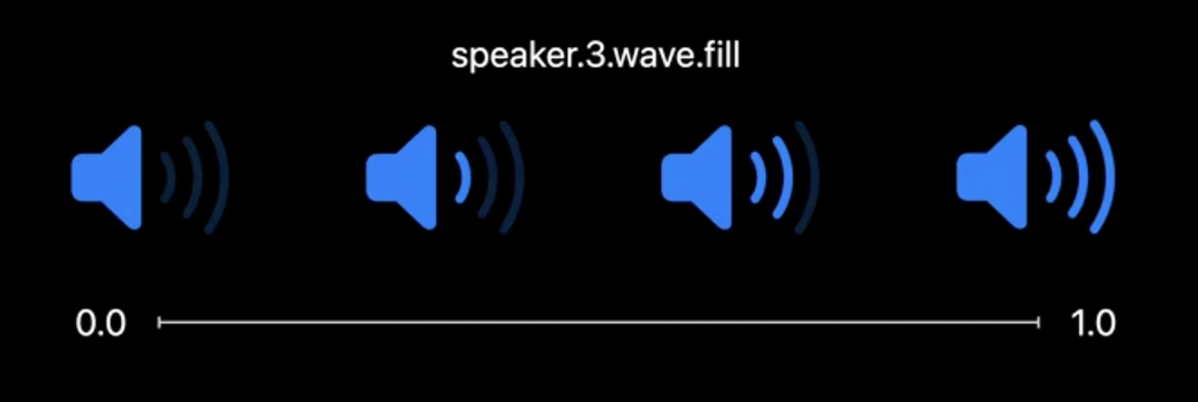
- 0~1 사이의 값을 지정해서, 해당 값을 기반으로 다양한 variation을 제공하는 심볼
variable symbol 지원UIImage( systemName: "wifi", variableValue: 0.6, configuration: redPalleteConfiguration // 다른 렌더링 모드와 섞는 것도 가능 )
- 0~1 사이의 값을 지정해서, 해당 값을 기반으로 다양한 variation을 제공하는 심볼
- UISheetPresentationController의 detent에 커스텀 기능 제공
-
- Sendable 지원 추가 - 이는 해당 타입들이 immutable하기 때문
- UIImage
- UIColor
- UIFont
- UITraitCollection
- actor Processor { ... } class ImageView: UIViewController { let processor = Processor() func sendImageForProcessing(_ image: UIImage) async { let fancyImage = await processor.process(image) /// display fancyImage } }
- Stage Manager 등장
- UIScreen API를 쓰고 있지 않다면 이점을 그대로 누릴 수 있다.
- UIScreen.main 및 UIScreen 업데이트 관련 노티피케이션은 이제 deprecated. stage manager가 있기 때문에 앱이 더이상 main screen에 있다고 가정할 수 없기 때문이다.
- 대신 traitCollection이나 UIScene API를 써라.
- Self-Sizing Cell
- Self-Resizing이 기본값이 되었다.
- visible Cell안의 content가 변하면, cell이 자동으로 리사이징 된다.
- class UICollecitonView { // 기본값은 .enabled var selfSizingInvalidation: SelfSizingInvalidation }
- resizing을 하기 위한 원리
- selfSizingInvalidation이 켜져 있으면 셀은 자신을 가지고 있는 tableView혹은 CollectionView에 자신을 리사이징 해달라고 요청할 수 있다.
- UIListContentConfiguration을 쓰는 경우 Configuration 변화에 따라 자동으로 요청한다.
- 그 외의 경우는 cell이나 contentView에 invalidateIntrinsicContentSize() 호출하면 된다.
- 기본적으로 애니매이션이 적용되는데, 애니매이션을 끄고 싶은 경우, UIView.performWithoutAnimation 메소드 안에서 invalidateIntrinsicContentSize를 호출하면 된다.
- 호출한다고 바로바로 하는 건 아니고 모았다가 한꺼번에 적절한 타임에 한다.(coaleasing)
- 오토레이아웃을 쓰는 경우, contentView 내부에서의 레이아웃 변화에 따라 자동으로 invalidateIntrinsicContentSize를 호출하게 할 수 있다.
- selfSizingInvalidation = .enabledIncludingConstraints
- selfSizingInvalidation이 켜져 있으면 셀은 자신을 가지고 있는 tableView혹은 CollectionView에 자신을 리사이징 해달라고 요청할 수 있다.
- Sendable 지원 추가 - 이는 해당 타입들이 immutable하기 때문
- UIKit and SwiftUI
- UITableView와 UICollectionView의 셀 안에서 SwiftUI 뷰를 그릴 수 있게 되었다.
- cell.contentConfiguration = UIHostingConfiguration { VStack { Image(systemName: "wand.and.stars") .font(.title) Text("Like magic!") .font(.title2).bold() } .foregroundStyle(Color.purple) }
- UIDevice deprecations
- UIDevice.name이 더 이상 유저의 커스텀 디바이스 명이 아닌 모델명만을 반환(유저 핑거프린트 방지) → 커스텀 디바이스 명을 얻어내려면, entitlement가 필요하다.
- UIDevice.orientation을 설정하는 것은 더이상 지원하지 않는다.
- UIViewController의 PreferredInterfaceOrientation API를 대신 써서 원하는 방향을 지정하라.
반응형
'IOS - Swift' 카테고리의 다른 글
| [iOS/Swift] 애플로그인 (0) | 2023.02.27 |
|---|---|
| [iOS/Swift] presentedViewController / presentingViewController (0) | 2023.01.29 |
| [iOS/Swift] TableVIew 높이 유동적으로 조절하기 (0) | 2023.01.24 |
| [ios/swift] 컬렉션뷰 가로스크롤(storyboard) (0) | 2022.12.25 |
| [iOS/Swift] Tabbar 숨기기(가리기) -storyboard (0) | 2022.11.22 |